

Overview
The QR code system provides secure, password-free access for students. Each student gets a unique QR code and a matching PIN code — both printed on a single login card. They can scan the QR (personal device) or type the PIN (shared device) to sign in.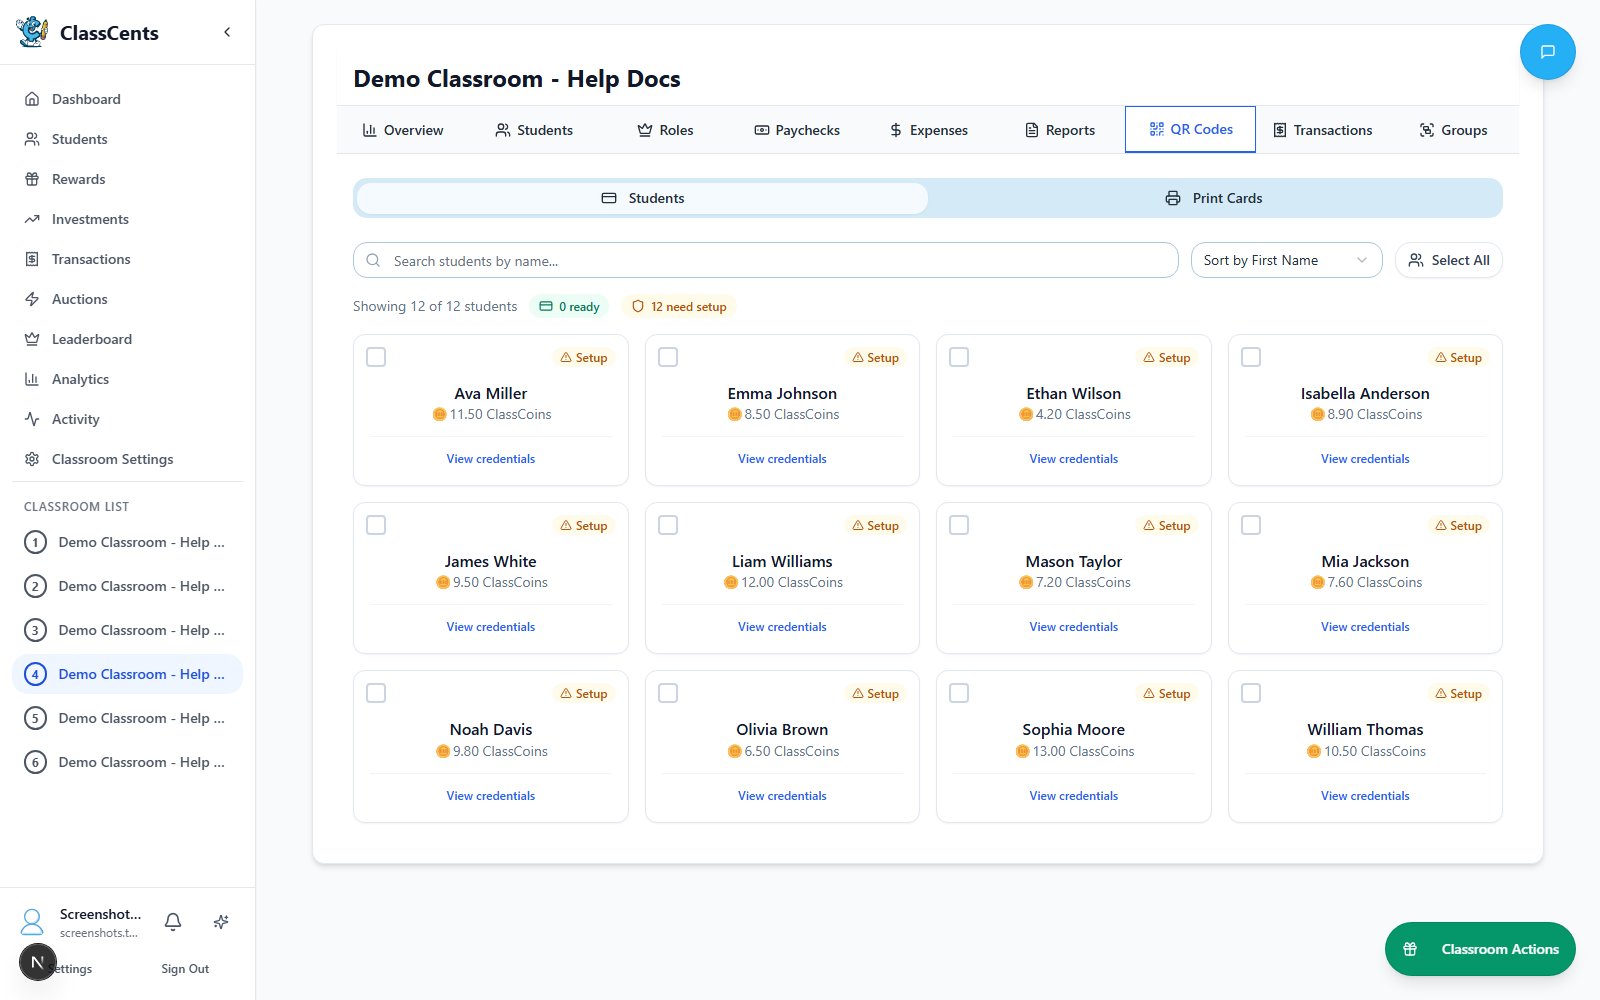
Printing Login Cards
Select Students
On the Students sub-tab, search/sort the roster and check the students whose cards you want to print. Use the select-all checkbox to grab the whole class.
Switch to Print Cards
Click the Print Cards sub-tab. You’ll see a preview of the cards laid out for printing.
Distribution Methods
- Individual Printouts
- Class Sheet
- Laminated Cards
- Digital Distribution
Best for: Personal student folders
- Print one QR code per student
- Each page includes student name
- Students keep in binder/folder
- Easy replacement if lost
Most common method for K-8
Using QR Codes
For Students
For Teachers
Monitor QR code usage:- See last access time for each student
- Track which students are actively using dashboards
- Identify students who may need device support
Security Features
Unique Nano IDs
Unique Nano IDs
Each QR code contains a student-specific nano ID:
- Cryptographically generated
- Impossible to guess
- One student per code
- Can’t be used to access other accounts
Refresh Access
Refresh Access
If a card is lost or compromised:
- Select the student(s) on the Students sub-tab
- Click Refresh Access
- Confirm — a new QR code and PIN are generated for each selected student
- The old QR and PIN immediately stop working
- Reprint the affected cards from the Print Cards sub-tab
No Personal Information
No Personal Information
QR codes contain:
- Random nano ID only
- No student name in URL
- No personal identifying info
- Safe to display publicly
Session Management
Session Management
- Sessions expire after inactivity
- Students automatically logged out
- Must scan QR again to access
- Prevents unauthorized access on shared devices
Best Practices
Explain to students: QR codes are like personal keys - don’t share them!
Create backups: Keep digital copies of all QR codes in secure location
Laminate high-use codes: Protects from wear and tear
Test before distributing: Verify each QR code works before giving to students
Display classroom master: Post all codes on wall for easy access during activities
Regular check-ins: Verify all students can still access their dashboards
Printing Tips
- Size Recommendations
- Print Quality
- Paper Choices
Optimal QR Code Sizes:
- 2x2 inches: Individual cards (minimum readable size)
- 3x3 inches: Standard printouts (recommended)
- 5x5 inches: Classroom display
- 8x8 inches: Large format for distance scanning
Classroom Setup Ideas
Entry Routine
Morning check-in station:
- Codes posted by door
- Students scan as they enter
- Check balance and set daily goals
- Builds routine and excitement
Technology Time
Device access integration:
- Students scan before using classroom devices
- Shop during designated tech time
- Combine dashboard check with learning activities
Friday Celebrations
End-of-week tradition:
- Weekly dashboard review
- Shopping time Friday afternoon
- Auction participation
- Celebrate top earnersin class
Student Folders
Personal organization:
- QR code in front of folder
- Quick access during any class time
- Students responsible for their own code
- Teaches personal accountability
Troubleshooting
QR Code Won't Scan
QR Code Won't Scan
Try these solutions:
- Improve lighting - QR codes need good light
- Clean camera lens - smudges prevent scanning
- Hold steady - keep camera still for 2-3 seconds
- Adjust distance - move closer or farther
- Try different app - some QR readers work better
- Check for damage - regenerate if code is torn/crinkled
Code Scans But Shows Error
Code Scans But Shows Error
This means:
- Student may have been archived/deleted
- QR code was regenerated and this is old code
- Database connection issue
- Generate fresh QR code for student
- Verify student is active in your roster
- Contact support if persists
Student Sees Wrong Dashboard
Student Sees Wrong Dashboard
Very rare but possible:
- Student scanning someone else’s code
- QR codes got mixed up during distribution
- Verify student has correct code (name should match)
- Regenerate all codes if widespread issue
Advanced: Direct URL Access
For older students or 1:1 device environments: Each student dashboard has a direct URL:- Bookmark this URL
- Type it directly
- Add to home screen on mobile devices
- Share with parents for progress viewing
Parent Access
Parents can view student progress:- Send QR code image to parents
- Parents scan with their phone
- They see same dashboard as student
- Great for parent-teacher conferences!
Related Topics
Student Dashboard
Full overview of dashboard features
Student Features
How students earn and spend currency